Magnification
Learning Objectives
After completing the lab, the student will be able to:
- Determine the total magnification of each objective lens.
- Explain or describe the field of view.
Activity 2: Pre-Assessment
- So far you have only viewed a slide at the lowest power of the microscope. How do you think the field of view will change as you move to higher powers on the microscope?
- The microscope makes small organisms appear larger so that scientists can more carefully observe them. How can you measure the size of small organisms on the slide of a microscope?
Activity 2: The Field of View
When you first place a specimen on the microscope’s stage, the image you see in the ocular lens will likely appear blurry. Pull focus by changing the distance between the object and the microscope lens to reduce blurriness. This is because light rays from the object are not reaching your eye at the same time. Focusing is used to improve the image. Focusing moves the stage up and down, which changes the point at which the light rays from the object converge. When the stage is at a position so that the light rays exactly converge on the retina of your eye, the image will appear sharp and clear.
When focusing the specimen, you must be careful! The distance between the objective and the specimen is very small, and it is possible to crush the specimen against the lens if you move the stage too far. The proper distance between the specimen and the object is called the working distance.
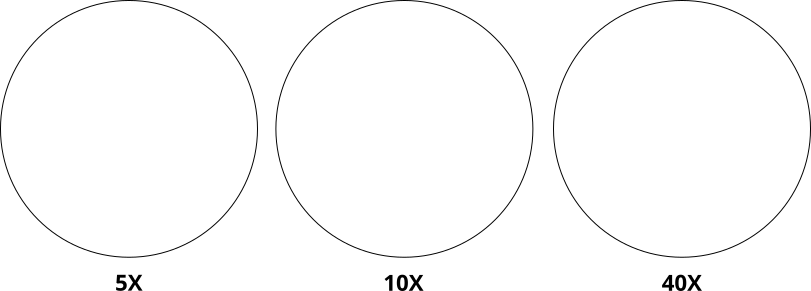
When you look at a specimen through the microscope’s lenses, you will likely not see the entire specimen at one time. Because the microscope enlarges the image of the object, only a small portion of the object will be visible at any given time. The field of view refers to the portion of the object that is seen through the ocular lenses (see Figure 2.3).
Safety Precautions
- Handle microscopes and lenses with care.
- Do not drop or crush slides.
For this activity, you will need the following:
- Compound microscope
- Slide with the letter e; if you do not have premade slides, cuttings from a newspaper can be taped to a slide
- Slide with a stage micrometer or a clear millimeter ruler taped across the center of the slide.
For this activity, you will work in pairs.
Structured Inquiry
Step 1: Turn the revolving nosepiece of the microscope so that the lowest power objective is pointed at the stage.
Step 2: Place the slide with the letter e on the stage. Make sure it is oriented so that you can read the letter e correctly with the naked eye while standing at the microscope.
Step 3: Hypothesize/Predict: How do you think the letter e will appear under different magnifications? Draw your predictions in your lab notebook.
Step 4: Student-Led Planning: Change the magnification by turning the revolving nosepiece. Draw your observations in your lab notebook.
Step 5: Critical Analysis: How do your observations compare to your predictions? Why do you suppose the letter e looks different under the microscope and at different magnifications?
The Letter “E”[1]
- Visit the BioNetwork’s Virtual Microscope
- Click on “Explore”
- Click the sample box “?”
- Click “Sample Slides”
- Click “Letter E”
- The slide is oriented so the “e” is right side up
- What do you observe with the image under the microscope?
- The image is blurry so pull focus
- Switch between scanning, low power and high power
- Draw the “e” at scanning, low and high magnification (Figure 2.4)
Guided Inquiry
Step 1: Hypothesize/Predict: From your observations of the letter e, hypothesize how large the field of view is under the low-power objective. To do this, measure the letter e, in millimeters, and then calculate how many letter e’s would fit in the field of view. From that, hypothesize the size of the field of view, in mm. Will the size of the field of view change when you change magnifications? Based on the change in magnification, hypothesize the size of the field of view under the high-power objective.
Step 2: Student-Led Planning: With your partner, formulate a plan to measure the field of view using either the stage micrometer or the slide with the attached ruler. Observe the micrometer or ruler under the microscope to understand how it works before measuring. Then take three measurements of the field of view under low power. Repeat under high power. Write your results in your notebook.
Step 3: Critical Analysis: How did your estimated size of the field of views from Step 1 compare to the measurements you made using the micrometer or ruler? How does the size of the field of view change as the magnification changes?
Assessments
- When you take a picture on your phone, does the field of view get larger or smaller as you increase the magnification? How does this compare to the microscope? Explain.
- As you increased in power on the microscope, the image became darker. Why do you suppose this is so?
- The Letter “E” activity is adapted from Microscopy in Biology OER, a site sponsored by the Ursula Schwerin Library to select and curate resources for use in General Biology 1 and originally authored and curated by Jeremy Seto, Department of Biological Sciences – New York City College of Technology. It is licensed CC-BY-NC-SA. ↵
